
It’s Art & Science
Back in the day, I was the proud owner of a salty 42-foot wood Downeaster I six-packed throughout my college years. Early spring in the Northeast brought the whirl of power tools along with the hustle and bustle of getting boats everywhere in the yard ready to launch. I would invite several of my college buddies to help me sand and paint my boat’s hull in return for a cooler full of beer, a daily assortment of sub sandwiches and a day out fishing once the boat was back in the water. All usually went well except when it came time to paint.
I took special pride back then in my ability to prime and topcoat the hull with a flawless brush stroke. In addition, my razor-sharp, arrow-straight boot stripe/waterline would have made Leo da Vinci utter, “Bravo, Ottimo lavoro,” loosely translated to “a job well done.”
Loading up their brushes with paint right through the heel and up to the ferrule caused rivulets, drips, sags and mudslide-looking furrows to form and, unable to defy gravity, run down the hull sides. My compadres caused more work than necessary. The upshot meant waiting for the mess to dry, sanding it down smooth once again, and starting all over by myself. While my intentions were good, I had paved the road to perdition with them.
Clean Surface is Key
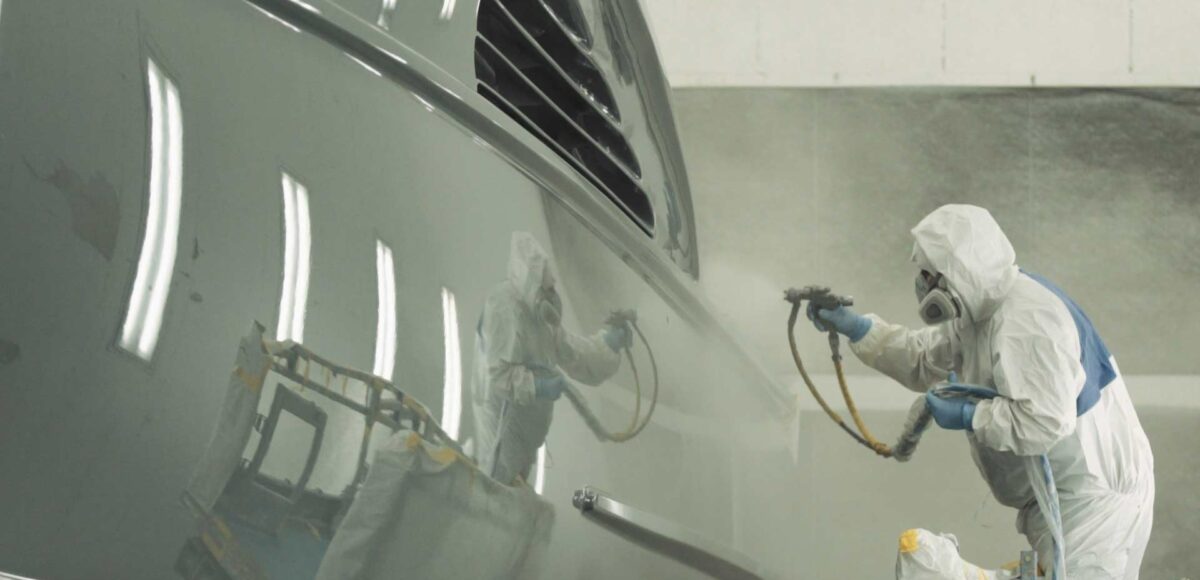
Much has changed since those days. Painting has become a precise science, with specially trained technicians using highly advanced application equipment in climate and temperature-controlled paint booths. Here, strict attention is paid to the preparation and application of carefully manufactured products, resulting in a finish that is not only beautiful to look at but is highly protective in the severe sportfishing environment as well.
“It all starts with the surface condition of the boat’s exterior,” said Jeff Grandgenett, Sales & Marketing Manager for Alexseal. “If there is any cracking or crazing in the paint, substrate or gelcoat, it must be fixed first. What we’re going for here, and way before we even think about paint application, is a pristine surface.” That old saw, that it is 90% preparation and 10% application, holds especially true, as the greater part of this kind of work will be the labor.
Painting has become a precise science, with specially trained technicians using highly advanced application equipment in climate and temperature-controlled paint booths.
Should you have any flaws, whether deep or not, they must be dug out completely right down to the actual damage itself. “Any work like this, once the fairing compound is applied, must be feathered to avoid any hard edges. We use our #202 fairing compound, after which the repair will be sealed with #302 Super Build,” said Grandgenett. “We have a full system from start to finish for new builds and repairs/repaints.”
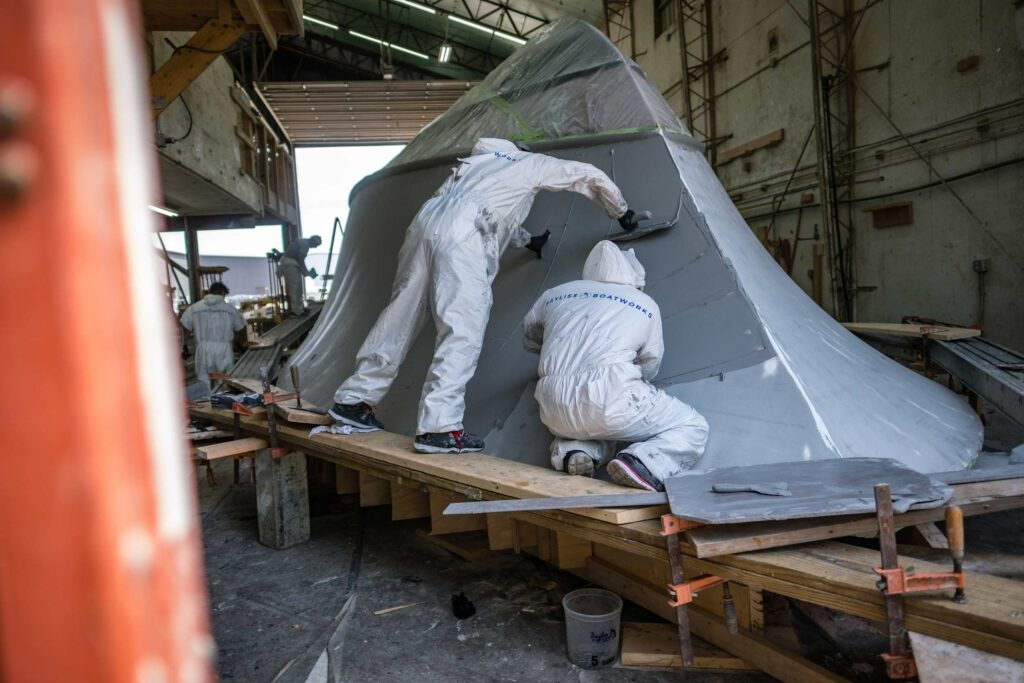
Since lots of dust and dirt are raised during the process, there is some discussion on where to do it. That is, totally inside or both inside and outside. As for the topsides prep, while critical to the finished product, it does not strictly require clean surroundings. It can be done in a protected space such as a tent. However, it is essential that once the hull is faired, that everything from here on requires an enclosed and controlled environment.
“When we get to this point, it’s time to prime the surface and once dry, sanded and wiped clean to get ready for top coating,” said Grandgenett. “And remember, it’s critically important to have the correct mil thickness for primer and topcoat.”
Your application manager or boat builder will be able to make sure this is taken care of at the onset of your project. “When one of our boats comes back into the yard for a full re-do on the paint job, the first step is to find out where the low spots are,” said Peyton Lanier, a member of Jarrett Bay Boatworks’ New Construction Engineering Team. “Depending on the condition of the hull, and if any fairing is necessary, we’ll begin sanding with paper, in the 150 range and then come back with the right primer on record.”
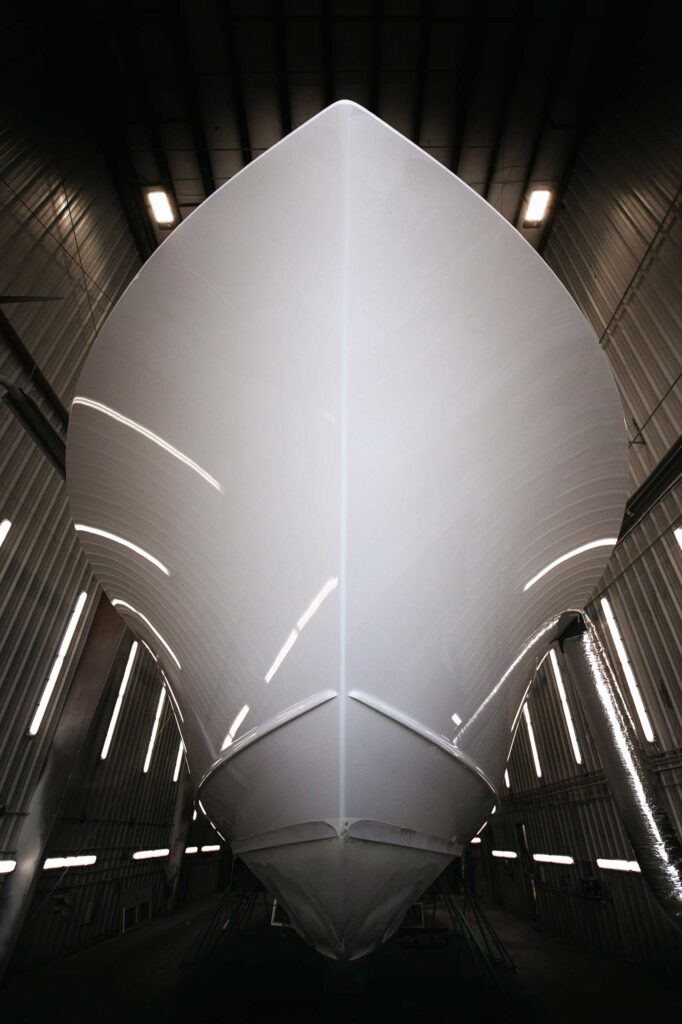
Once applied, another sanding is done with 220-300 paper after which the hull is carefully cleaned, and then ready for its topcoat. The step between the primer and topcoat is important in creating the color depth necessary for the kind of stand-out finish desired.
Post-Curing
There may be a time when post-curing is advisable. It’s a topic Lanier also touched on. “Any possible ‘movement,’ such as expansion and contraction, occurring in the substructure, the fiberglass, foam core or the paint as well as other areas of construction, which are acted upon by heat and expansion, are taken into consideration.”
To make this happen in warm weather conditions, the boat is brought outside for a few days to get the surface temperature up, thus allowing the thermal properties of the fiberglass to settle in. “On days which are not conducive to the out-of-doors, we’ve started to use heavy-duty, commercial heating blankets to get the surface temperature of the epoxy up to 185/190°. We then let it stay there for six to eight hours to take care of the necessary post-curing of that fiberglass structure,” Lanier added.
The paint booths have filtered air handlers, and dry air running the paint guns. Spray time depends upon the size of the vessel, but Lanier indicates once the process is completed, a week or so is necessary for the paint to fully cure.
“During winter operations it’s a bit longer, but in summer three days will usually do it,” he says.
Chris Cavanaugh, Paint Tech for Bayliss Boatworks, said, “After the fiberglass is applied, we use an epoxy coating compound, then sanded, after which comes two pulls of Alexseal All Fair and then block hand-sanding.”
Alexseal, used by Jarrett Bay, Bayliss Boatworks, and others, offers its #501, a polyester product that has been around for a while, and its new acrylic-based X-Series paint. The former results in a harder finish that can buffed and is scratch resistant but requires a bit more skill to repair. The latter is somewhat softer, will dry faster, and is easier to polish and repair. Both offer UV protection.
For those of you who would rather put roller and brush in hand and have a go at it, Interlux has a line-up of products to suit your needs. Unless you have an enclosed space to see things through, it’s best to pick your days for each phase of the endeavor.
“From the waterline up, you must clean all the areas,” said Interlux tech Joe Hernandez. “Use our #202 solvent and once done, sand with 120 grit paper to knock all the gloss off the gelcoat.”
Ready to Paint
With the surface clean, it will be sanded once more and wiped down, after which comes the company’s one-part PreKote primer.
“Let it dry for 24 hours and the next day, a light sand with 220-grit and wipe with a damp cloth. You’re ready for your second coat of primer,” said Hernandez.
After the second coat dries and is again sanded and cleaned with a damp cloth, it’s time for your first coat of Brightside, a shiny, one-part, polyurethane paint that should be dry in 24-48 hours depending on conditions. Lightly sand your surface with 320-grit, wipe down and get your second coat on.
“In between coats it’s Interlux’s #333 Reducer, a cleaning solvent, applied to the entire surface,” added Hernandez. Any hull repairs must be completed first before priming. Clean the area, grind it down and, with gelcoat and fiberglass hulls, fill it with a two-part, watertight filler, and sand smooth. “Waxing is an option with our Brightside as it is a hard finish and only requires proper cleaning,” said Hernandez.
Any discussion about painting would be incomplete without mentioning Imron. According to the Axalta Coating Systems company, its paint systems, from fairing compounds, primers, base, clear and polyurethane topcoats are high-performers able to deliver the kind of durable, UV- and abrasion-resistant finishes the brand has become known for.
“After the fiberglass is applied and ready for fairing, we apply an epoxy coating compound, after which it is block-sanded smooth,” said Chris Cavanaugh of Bayliss Boatworks. Block-sanding means using a block of wood for hand-sanding and goes from 60- to 80- to 120-grit paper depending on the required finish.
Once everything is prepared, the Bayliss technicians will spray with Alexseal Super Build after which comes another sanding. This is followed by two coats of epoxy finish primer, sanded with 120-grit, followed by yet another coat of primer which is then left to cure.
“Up to a month is preferable but at least two weeks,” said Cavanaugh. All Bayliss boats are worked on inside a shed until ready for two coats of sprayed-on Imron primer and then moved over to a spray booth for its Imron finish coat.
“From fairing to finish coat, and while each project is unique, especially when we’re doing several boats at the same time, this process could take up to a month and a half,” said Cavanaugh.
With repair jobs, the work will be done, primer sprayed, cleaned and washed, and finished off with the Axalta products.
“We tell our owners not to apply any wax for about two months to allow the finish to gas off,” added Cavanaugh.
Painting your boat is a major investment, and if you are not having it done by your boat builder, make sure you establish a good relationship with your applicator, get references and do your due diligence. And unlike me, who has to deal with the major aftereffects of drips, sags and furrows of biblical proportions, your topcoat, with proper upkeep, maintenance and waxing, will be a source of pride for many years to come.
Lead Photo: Jarrett Bay / Luke Pearson
Dive Deeper into the World of Sportfishing
Unlock Exclusive Savings: Enjoy 50% Off Your Subscription!
Are you ready to explore the thrilling world of sportfishing from the comfort of your home? Subscribe now and embark on a journey filled with captivating stories, expert insights, and insider tips. Choose between our digital or print edition and secure an incredible 50% discount on your subscription.
Subscribe today and get ready for an adventure like no other. Click here to subscribe and elevate your sportfishing experience with InTheBite Sportfishing Magazine.
